Contents
- 1 If you want to remove a picture from your music player on your Android device, you can follow these steps:
- 2 You can follow these steps too:
- 3 How do I delete music from my Android phone?
- 4 How do I clear my music cache on Android?
- 5 How do I stop music from playing automatically on my Android phone?
- 6 How do I change my default music player on Android?
- 7 How do I change the background picture on the music player on an Android phone?
- 8 How do I delete photos from Google Play Music?
- 9 Here’s how to delete songs and albums from your Google Play Music library:
- 10 Note: You can’t delete your purchased albums from Google Play.
- 11 How do I take the cover off my Samsung Music?
- 12 How do you change the picture on the Apple Music app?
- 13 How do you change the background of a video in music?
- 14 How do I change incorrect album art on the default Music Player of the Samsung Galaxy S III?
If you want to remove a picture from your music player on your Android device, you can follow these steps:
1. Open the music player app on your Android device.
2. Find the song or album you want to remove the picture from.
3. Tap on the album or song to open the options menu.
4. Tap on the edit option.
5. Tap on the picture icon.
6. Tap on the remove option.
7. Tap on the save option.
You can follow these steps too:
There are a few quick and easy steps to follow to remove a picture from the music player on your Android device:
1. Open up the music player application on your Android device.
2. Locate the picture you wish to remove from the music player.
3. Once you have found the picture, tap and hold on to it for a few seconds.
4. After a few seconds, a pop-up menu will appear on-screen.
5. From this pop-up menu, select the ‘Delete’ option.
6. Finally, confirm that you wish to delete the picture by tapping the ‘OK’ button.
And that’s all there is to it! Once you have followed the steps above, the picture will be successfully removed from your music player.
How do I delete music from my Android phone?
Like many Android users, you probably keep music on your phone. And if you’re not careful, it can take up a lot of space. So what do you do when you want to delete music from your Android phone?
There are a few different ways to do it, depending on how much music you have and how you want to delete it. If you have a lot of music and want to delete it all at once, the easiest way is to connect your phone to your computer and use a file manager to delete the music files.
If you only want to delete some of the music on your phone, you can do it from the phone itself. Open the music player app and delete the songs you don’t want.
Finally, if you have limited space on your phone and need to free up some space quickly, you can use a file manager to delete temporary files, cache files, and other junk files that are taking up space.
No matter how you do it, deleting music from your Android phone is easy. Remember to back up your music collection first to keep everything meaningful.
How do I clear my music cache on Android?
1. Open the Settings app on your Android.
2. Scroll down and tap on the “Storage” option.
3. Tap on the “Internal storage” option.
4. Scroll down and tap on the “Cached data” option.
5. Tap on the “Clear cache” button.
You should now see a message saying the cache has been cleared if your music cache is a temporary file where your Android stores information about recently played songs. This file can become corrupted over time, leading to playback issues or other problems. You can clear your music cache by following these simple steps:
If you still have problems with your music playback, try clearing your app data.
How do I stop music from playing automatically on my Android phone?
Like many Android users, music starts playing automatically on your phone occasionally. A few different things can cause this, but fortunately, there are also a few ways to stop it.
One common cause of music playing automatically on your Android phone is that you’ve accidentally enabled a feature called “media scanner.” This feature automatically scans your phone’s storage for new media files and adds them to your music library. You can disable the media scanner if you don’t want new files to be added to your library.
Another common cause of music playing automatically is that you’ve installed a third-party music player that has this feature enabled. If you want to stop the music from playing, you’ll need to open the settings for the music player and disable the auto-play feature.
Finally, it’s also possible that your phone will play music automatically when certain events occur, such as when you plug in headphones or connect to a Bluetooth speaker. To stop this from happening, you’ll need to change the settings in the “Sound & Notification” section of the Android Settings app.
Hopefully, one of these solutions will help you stop music from playing automatically on your Android phone.
How do I change my default music player on Android?
If you’re not happy with your default music player on Android, it’s easy to change. Several good music players are available for Android, and many are free.
To change your default music player, open the Settings app and tap “Apps.” Scroll to the “Audio & Video” section and tap on your default music player. Tap “Clear defaults” to reset it.
When you tap on a music file, you’ll be prompted to choose a new default music player. Select the one you want and tap “Always” to make it your new default.
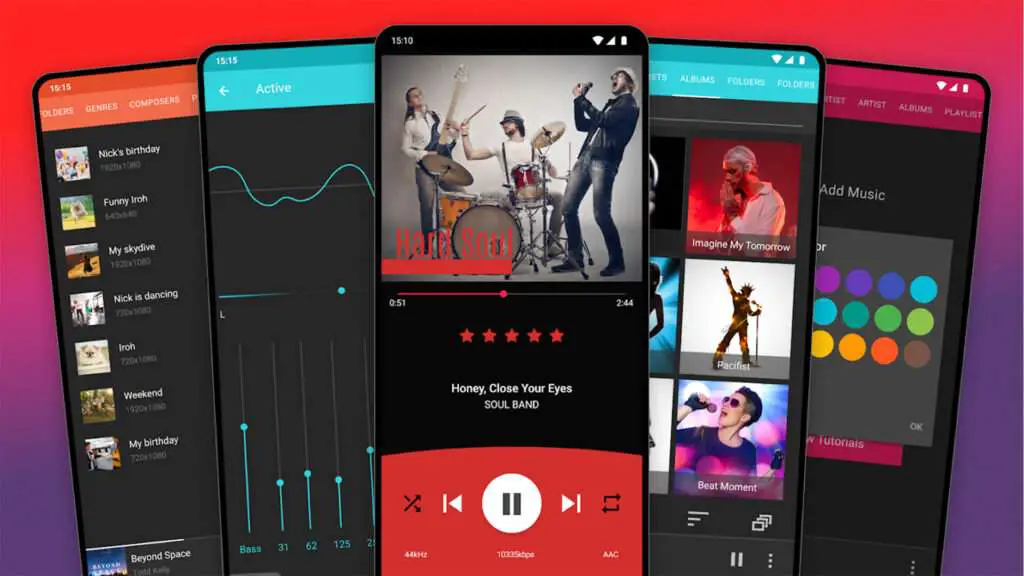
How do I change the background picture on the music player on an Android phone?
Assuming you would like an article discussing how to change the background picture on an Android music player:
Most music players on Android phones allow users to change the background picture. This can be done by opening the music player app and going to the settings menu. The settings menu should have the option to change the background picture. The user may need to update the music player app if this option is unavailable.
How do I delete photos from Google Play Music?
If you’re a Google Play Music subscriber, you can delete songs and albums from your library using the Google Play Music app or the Google Play Music web player.
Songs and albums you delete are removed from your Google Play Music library and any devices synced with your library. If you delete a song or album from your library purchased from Google Play, you can still re-download it later if you need to.
Here’s how to delete songs and albums from your Google Play Music library:
Delete a song
Open the Google Play Music app.
Tap an album or playlist.
Tap the Menu icon > Delete or Remove from the playlist.
Delete an album
Open the Google Play Music app.
Tap an album or playlist.
Tap the Menu icon > Delete or Remove from the playlist.
Note: You can’t delete your purchased albums from Google Play.
How do I take the cover off my Samsung Music?
Assuming you would like a step-by-step guide on how to remove the back cover of a Samsung Music Player:
1. Start by locating the small notch on the back cover near the bottom of the device.
2. Insert your fingernail or a small pry tool into the notch and gently lift the back cover.
3. Work your way around the entire perimeter of the device until the back cover pops off.
4. If the back cover is stubborn, try gently pushing down on the front of the device while simultaneously pulling up on the back cover. This should release any remaining clips holding the cover in place.
Removing random gallery photos as album art. (How to Do)
You know how frustrating it can be if you’ve ever found a random photo in your gallery set as your album art. Here’s how to remove it and put your album art.
First, open your gallery app and find the photo set as your album art. Once you’ve seen it, long-press on the photo to open the context menu. From here, tap on the “Remove” option.
Next, open your music player app and go to the album or artist whose art you want to change. Tap on the album or artist to open the context menu, then tap the “Edit” option.
Tap the album art thumbnail to open the photo picker, then select the “Gallery” option. Find the photo you want as your album art, then tap the “Done” button.
Your new album art will now be applied!
How do you change the picture on the Apple Music app?
If you want to change the picture on your Apple Music app, there are a few steps you need to follow. First, open the app and tap the profile icon in the top left corner. Then, tap on the edit button in the top right corner. You can change your profile picture by tapping on the camera icon. If you want to remove your profile picture, tap the x icon.
How do you change the background of a video in music?
If you want to change the background of a video in music, you can use video editing software. Many video editing software programs have a “green screen” or “chroma-key” function that allows you to superimpose one video over another. This is how many news programs can have the weather forecaster appear in front of a map or how movies can place actors in front of a computer-generated background.
You must shoot your video before a green screen to use this function. You can buy a green screen fabric at a fabric store or paint a wall green. Once you have your green screen set up, shoot your video. Ensure plenty of light so the green screen is well-lit, and there are no shadows.
Once you have your video, open it in your video editing software. Look for the green screen or chroma essential function and select it. Then, choose the video that you want to use as the background. The software will automatically remove the green from the video and replace it with the background video.
You can also use this technique to add special effects to your video. For example, you can shoot your video in front of a blue screen and then add a video of the ocean as the background. This will make it look like you are standing in the sea.
Experiment with different background videos to find the one that looks best with your video. You can also use this technique to create a fake location for your video. For example, if you want to make it look like your video was shot in front of the Eiffel Tower, you can find a video of the Eiffel Tower and use it as your background.
Remember to save your video when you are finished to watch it again later.
How do I change incorrect album art on the default Music Player of the Samsung Galaxy S III?
If you’ve ever looked at your Samsung Galaxy S III and noticed that the album art for one or more of your music files needs to be corrected, don’t fret, it’s easy to change. Here’s how:
1. Open the default Music Player on your Galaxy S III.
2. Next, find the song or album whose artwork you’d like to change.
3. Once you’ve found the song or album, tap on the artwork to select it.
4. Finally, tap the “Change Album Art” button on the screen.
You can select a new image from your gallery or take a new photo to use as the album art. Once you’ve chosen the new image, tap the “Done” button, and the new artwork will be applied to the song or album.
