The app commonly used to access SMB (Server Message Block) shares on Android devices is called “Solid Explorer.” Solid Explorer is a feature-rich file manager that supports many file systems, including SMB/CIFS (Common Internet File System). It provides a user-friendly interface and allows you to connect to SMB shares on your local network and access files and folders just as you would on a computer.
Contents
- 1 To access SMB shares using Solid Explorer, you need to follow these steps:
- 2 Can Android do SMB?
- 3 How do I access SMB share?
- 4 How do I connect to Samba Share on Android?
- 5 How do I view SMB files?
- 6 What is an SMB app?
- 7 Can you access SMB remotely?
- 8 How to add SMB to VLC Android?
- 9 What is Samba in Android?
- 10 Mount SMB share on Android?
1. Install Solid Explorer: Search for “Solid Explorer” in the Google Play Store and install the app on your Android device.
2. Launch Solid Explorer: Open the Solid Explorer app on your device.
3. Add an SMB connection: Tap on the three-line menu icon in the app’s top-left corner to open the side menu. Select “Storage Manager” or “Network” from there to access the network storage options.
4. Connect to SMB share: Tap on the “+” button or “Add” to add a new network connection. Choose “SMB/CIFS” from the available options.
5. Enter connection details: Provide the necessary information, such as the server IP address or hostname, shared folder name, username, and password. You may also need to specify the workgroup or domain if applicable.
6. Save and connect: After entering the connection details, tap “Save” or “Connect” to establish the connection to the SMB share.
7. Access files and folders: After successfully connecting to the SMB share, you can browse and access the files and folders stored on the remote server. Solid Explorer provides a familiar file management interface with options for copying, moving, deleting, and organizing files.
Solid Explorer offers features like cloud storage integration, root access, and FTP/SFTP support, making it a versatile file manager for Android devices. Its support for SMB shares makes it a go-to choice for users accessing files from Windows-based network shares directly on their Android devices.
Can Android do SMB?
Android can access SMB (Server Message Block) shares, allowing users to connect to and access files and folders on SMB servers or other devices within the same network. With the right app and network configuration, Android devices can seamlessly integrate with SMB shares, enabling file sharing and collaboration.
To access an SMB share on an Android device, you need to follow these general steps:
1. Install an SMB app: Android does not have built-in support for SMB shares, so you’ll need to install a dedicated app from the Google Play Store. Solid Explorer, X-plore File Manager, and ES File Explorer are popular options.
2. Launch the SMB app: Open the installed SMB app on your Android device.
3. Add an SMB connection: In the app, look for an option to add a new network connection or server. Tap on it to start the process.
4. Enter connection details: Provide the necessary information, such as the server IP address or hostname, shared folder name, username, and password. You may also need to specify the workgroup or domain if applicable.
5. Save and connect: Once you’ve entered the connection details, save the configuration and establish the connection to the SMB share.
6. Access files and folders: After successfully connecting to the SMB share, you can browse and access the files and folders stored on the remote server using the app’s interface. You can perform various file operations, such as copying, moving, deleting, and organizing files.
You can use an SMB app like Solid Explorer or X-plore File Manager to connect to a Samba share on Android. Here’s a step-by-step guide:
1. Install an SMB app: Download and install an SMB app from the Google Play Store. Solid Explorer and X-plore File Manager are popular choices.
2. Launch the app: Open the installed SMB app on your Android device.
3. Add a network connection: Look for an option to add a new network connection or server within the app. Tap on it to proceed.
4. Configure Samba details: Enter the required information, such as the server’s IP address or hostname, shared folder name, username, and password. Additionally, you may need to specify the workgroup or domain if applicable.
5. Save and establish the connection: After providing the necessary details, save the configuration and initiate the link to the Samba share. The app will attempt to connect to the specified Samba server.
6. Access files and folders: Once connected, you can browse the Samba share, view files and folders, and perform various file operations within the SMB app.
How do I view SMB files?
To view files stored on an SMB share on your Android device, you need to use an SMB app like Solid Explorer or X-plore File Manager. Here’s a general overview of the process:
1. Install an SMB app: Download and install an SMB app from the Google Play Store. Solid Explorer, X-plore File Manager, and ES File Explorer are popular choices.
2. Launch the app: Open the installed SMB app on your Android device.
3. Connect to the SMB share: Use the app’s interface to add a new network connection or server. Enter the necessary details, such as the server IP address or hostname, shared folder name, username, and password.
4. Establish the connection: Save the configuration and initiate the link to the SMB share. The app will attempt to connect to the specified SMB server.
5. Browse files and folders: Once connected, you can navigate the shared files and folders within the SMB app’s interface. You can view and interact with the files, such as opening documents or playing media files, depending on the capabilities of the SMB app you are using. The app should provide a familiar file management interface, allowing you to browse directories, open files, and perform various file operations like copying, moving, renaming, and deleting.
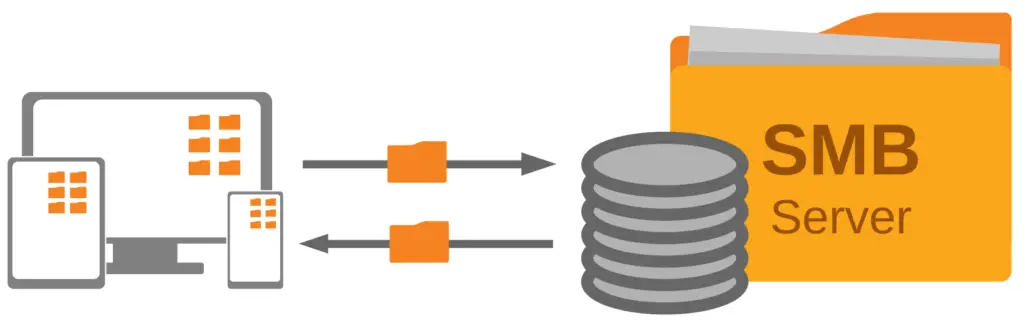
What is an SMB app?
An SMB app, also known as an SMB client or SMB file manager, is a software application designed to access and manage files and folders on SMB shares. SMB (Server Message Block) is a protocol commonly used for file sharing in Windows networks. Since Android devices do not have built-in support for SMBs, these apps bridge the gap by providing the necessary functionality to connect to and interact with SMB shares.
SMB apps typically offer features such as adding multiple SMB connections, browsing directories, viewing and opening files, performing file operations, and configuring connection settings. They ensure seamless integration between Android devices and SMB servers, allowing users to access files stored on Windows-based network shares directly from their Android devices.
Can you access SMB remotely?
It is possible to access SMB shares remotely, provided the necessary network configurations are in place. Remote access to SMB shares allows you to connect to and access files on SMB servers from outside your local network, such as over the Internet.
To access SMB shares remotely on your Android device, you typically need to follow these steps:
1. Ensure proper network setup: Set up your SMB server to allow remote connections and ensure the ports (usually port 445) are accessible through firewalls and routers.
2. Configure SMB app: Install an SMB app on your Android device and configure it with the appropriate connection settings, including the external IP address or hostname of the remote SMB server.
3. Enable remote access: Some SMB apps may have specific options or settings to enable remote access. Consult the documentation or settings within the app to enable this feature if available.
4. Connect to SMB share: Launch the SMB app on your Android device and establish a connection to the remote SMB share using the provided connection details.
5. Access files and folders: Once connected, you can browse and access the files and folders stored on the remote SMB server, just as you would when accessing it locally.
It’s worth noting that remote access to SMB shares may have security implications, so it is essential to take appropriate measures to ensure the security of your network and data. This includes using secure connections (such as VPNs) and implementing proper authentication and access control measures.
How to add SMB to VLC Android?
To add SMB (Server Message Block) to VLC on your Android device, follow these steps:
1. Install VLC: Download the VLC for Android app from the Google Play Store if needed.
2. Launch VLC: Open the VLC app on your Android device.
3. Access the Local Network tab: Tap on the hamburger menu icon (three horizontal lines) in the app’s top-left corner to open the side menu. From there, select “Local Network.”
4. Add a network location: Tap on the “+” button or “Add Network Location” to add a new network connection.
5. Select SMB: In the “Add Network Location” menu, choose “SMB” as the network protocol.
6. Enter connection details: Provide the necessary information, including the server IP address or hostname, shared folder name, username, and password. You may also need to specify the workgroup or domain if applicable.
7. Save and connect: After entering the connection details, tap “Save” or “Connect” to establish the SMB connection in VLC.
8. Access files and play content: After successfully connecting to the SMB share, you can navigate through the shared files and folders within VLC. You can locate and play media files stored on the SMB share directly in the VLC app on your Android device.
VLC provides a user-friendly interface for browsing and accessing files on the SMB share. You can navigate through directories, locate media files such as videos or music, and play them directly within the VLC app. Additionally, VLC offers various playback controls and settings to enhance your media viewing experience.
It’s important to note that adding SMB to VLC on Android may vary slightly depending on the version of the VLC app or any customizations made by the app developer. If you encounter difficulties or inconsistencies, referring to the app’s documentation or support resources can provide more specific instructions.
What is Samba in Android?
Samba is an open-source software suite that allows file and print services to be shared between different operating systems over a network. It implements the SMB/CIFS protocol, commonly used by Windows-based systems for file sharing. Samba provides interoperability between Windows and non-Windows systems, enabling seamless file sharing and collaboration.
In the context of Android, Samba is often referred to as the underlying technology or protocol used for accessing SMB shares on Android devices. Android devices do not have built-in support for SMB, but Samba enables communication and interaction between Android devices and SMB servers.
Samba enables Android users to connect to SMB shares, browse files and folders, and perform file operations using dedicated SMB apps available in the Google Play Store. These apps utilize the Samba protocol to establish connections and provide a user-friendly interface for managing files stored on SMB servers.
Overall, Samba enables Android devices to access and interact with SMB shares, facilitating seamless integration between Android and Windows-based networks.
Mounting an SMB share on Android involves creating a virtual link between your Android device and the SMB server, allowing you to access the shared files as if they were local to your device. While Android does not have native support for SMB mounting, you can achieve this functionality using third-party apps. Here’s a general guide on how to mount an SMB share on Android:
1. Install an SMB mount app: Search for and install one that supports SMB mounting from the Google Play Store. Some popular options include “Mount Manager” and “CifsManager.”
2. Launch the SMB mount app: Open the installed SMB mount app on your Android device.
3. Add a new mount point: Look for an option within the app to add a unique mount point or connection. Tap on it to proceed.
4. Enter connection details: Provide the necessary information, such as the server IP address or hostname, shared folder name, username, and password. Additionally, specify any other required parameters, such as workgroup or domain.
5. Save the mount point: Once you have entered the connection details, save the configuration. The app will use this information to establish the SMB mount point.
6. Mount the SMB share: From the app’s main interface, locate the saved mount point and tap on it to initiate the mounting process. The app will attempt to connect to the specified SMB server and create a virtual link to the shared files.
7. Access the mounted share: Once the SMB share is successfully mounted, you can access the files and folders as if they were stored locally on your Android device. Any file manager app can navigate the mounted share and interact with the files.
It’s important to note that the specific steps and features may vary depending on the SMB mount app you choose. Additionally, ensure you have the necessary permissions and network access to connect to the SMB server and successfully mount the share.
If you want to access SMB shares from your Android device, you have a few options available. One option is an Android Samba client, which allows you to connect to and access files on SMB servers. Several Samba client apps are available in the Google Play Store, such as Solid Explorer, X-plore File Manager, and ES File Explorer.
These apps provide a user-friendly interface and enable you to browse, view, and manage files and folders on SMB shares directly from your Android device. On the other hand, if you want to turn your Android device into an SMB server, you can use an Android Samba server app. This allows you to share files and folders from your Android device with other devices on the network. As for the best SMB client for Android, it depends on your specific requirements and preferences.
Solid Explorer is often recommended for its feature-rich file management capabilities, while X-plore File Manager is known for its dual-pane interface. When searching for an Android Samba client APK, download from trusted sources like the Google Play Store to ensure the app’s authenticity and security.
With the right app, you can access SMB shares from your Android device, providing seamless integration and easy file sharing between devices. Remember, you don’t necessarily need root access to mount SMB shares on Android, as these Samba client apps allow you to connect and access SMB shares without requiring root permissions.
